Writing NetCDF4 Data using Python (codes included)
NetCDF file format has been designed for storing multidimensional scientific data such as temperature, rainfall, humidity, etc. In this post, we will see how can we write our own data in the NetCDF file format.
For how to read a netCDF data, please refer to the previous post. Also, check the package and tools required for writing the netCDF data, check the page for reading the netCDF data.
Importing relevant libraries
import netCDF4
import numpy as np
Let us create a new empty netCDF file named “new.nc” in the ../../data directory and open it for writing.
ncfile = netCDF4.Dataset('../../data/new.nc',mode='w',format='NETCDF4_CLASSIC')
print(ncfile)

Notice here that we have set the mode to be “w”, which means write mode. We can also open the data in append mode (“a”). It is safe to check whether the netCDF file has closed, using the try and except statement.
Creating Dimensions
We can now fill the netCDF files opened with the dimensions, variables, and attributes. First of all, let’s create the dimension.
lat_dim = ncfile.createDimension('lat', 73) # latitude axis
lon_dim = ncfile.createDimension('lon', 144) # longitude axis
time_dim = ncfile.createDimension('time', None) # unlimited axis (can be appended to).
for dim in ncfile.dimensions.items():
  print(dim)
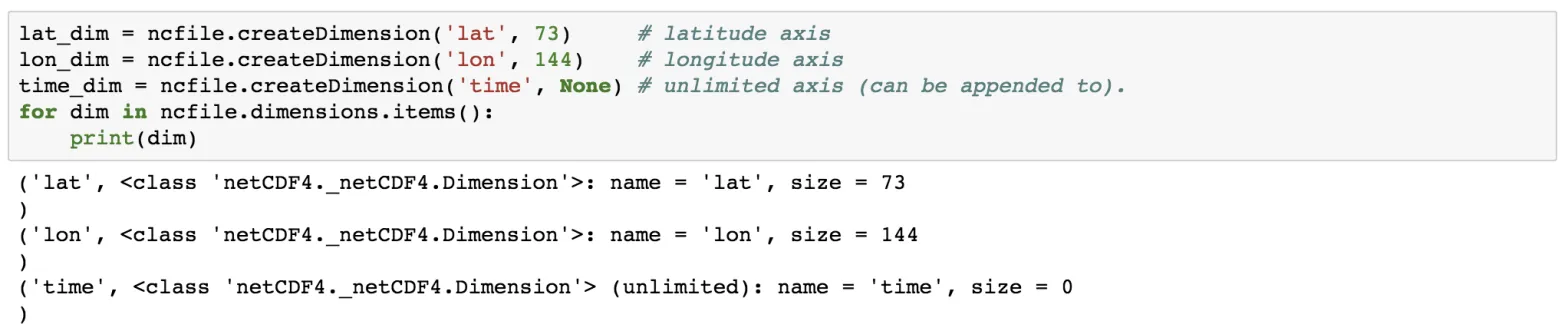
Every dimension has a name and length. If we set the dimension length to be 0 or None, then it takes it as of unlimited size and can grow. Since we are following the netCDF classic format, only one dimension can be unlimited. To make more than one dimension to be unlimited follow the other format. Here, we will constrain to the classic format only as it is the simplest one.
Creating attributes
One of the nice features of netCDF data format is that we can also store the meta-data information along with the data. This information can be stored as attributes.
ncfile.title='My model data'
print(ncfile.title)

ncfile.subtitle="My model data subtitle"
ncfile.anything="write anything"
print(ncfile.subtitle)
print(ncfile)
print(ncfile.anything)
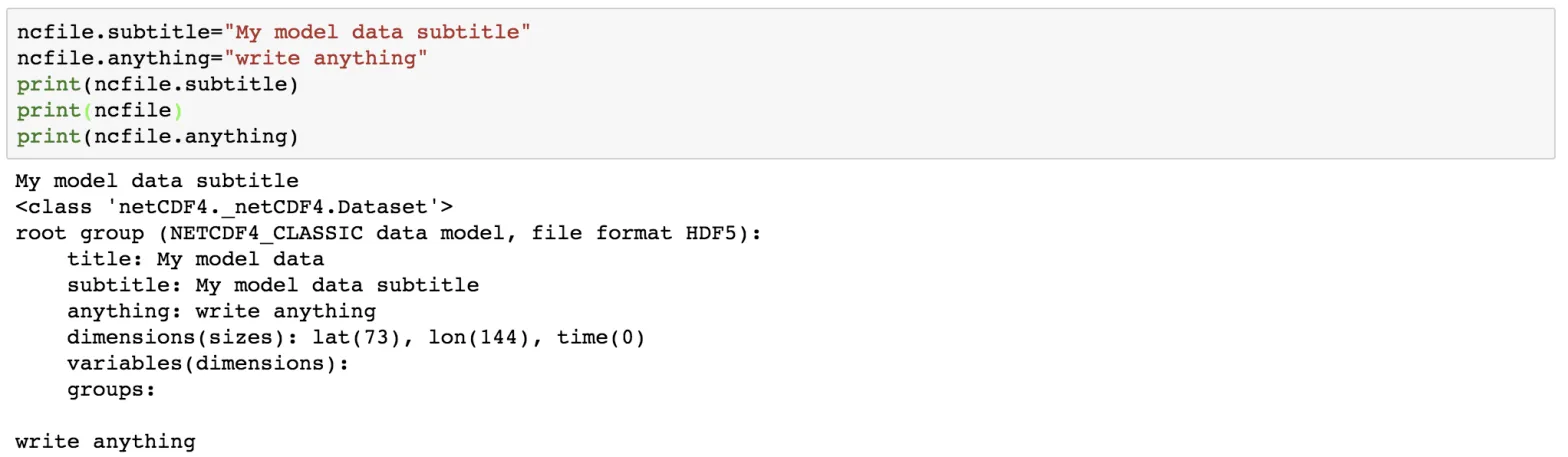
We can add as many attributes as we like.
Creating Variables
Now, let us add some variables to store some data in them. A variable has a name, a type, a shape and some data values. The shape of the variable can be stated using the tuple of the dimension names. The variable should also contain some attributes such as units to describe the data.
lat = ncfile.createVariable('lat', np.float32, ('lat',))
lat.units = 'degrees_north'
lat.long_name = 'latitude'
lon = ncfile.createVariable('lon', np.float32, ('lon',))
lon.units = 'degrees_east'
lon.long_name = 'longitude'
time = ncfile.createVariable('time', np.float64, ('time',))
time.units = 'hours since 1800-01-01'
time.long_name = 'time'
temp = ncfile.createVariable('temp',np.float64,('time','lat','lon')) # note: unlimited dimension is leftmost
temp.units = 'K' # degrees Kelvin
temp.standard_name = 'air_temperature' # this is a CF standard name
print(temp)
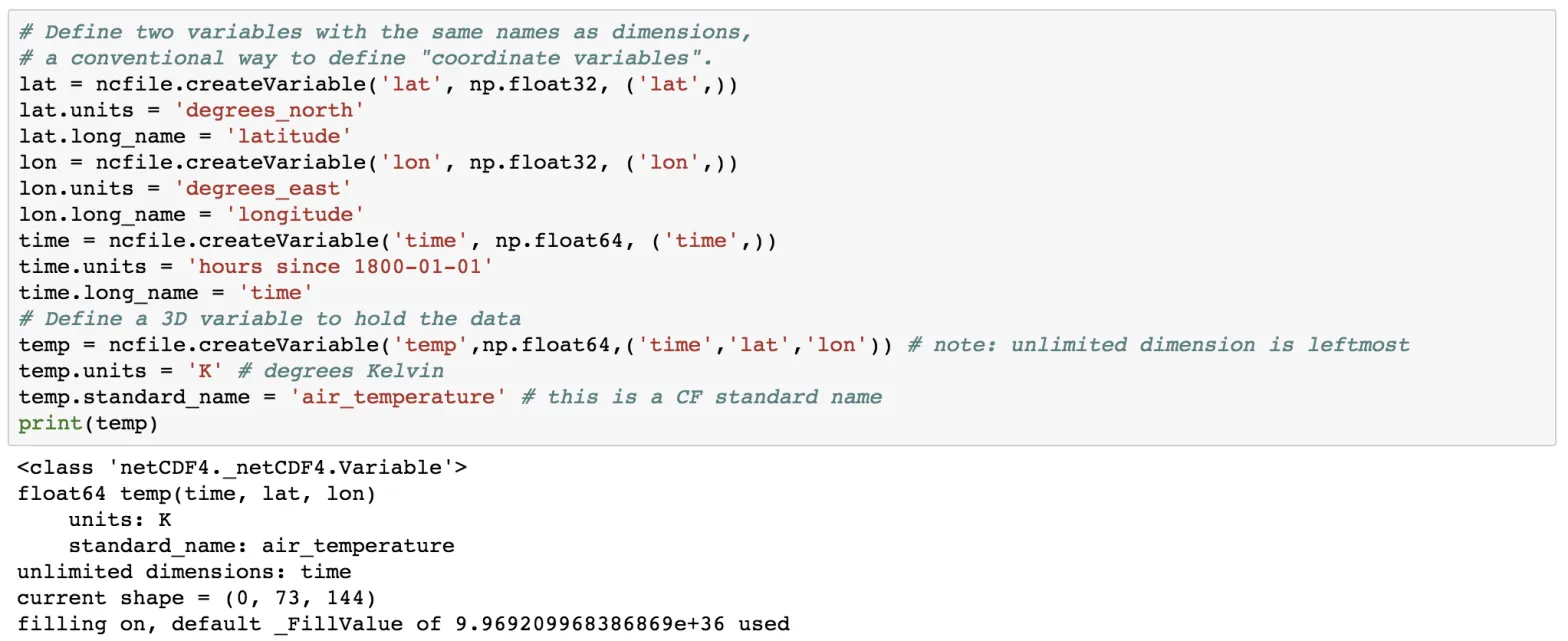
Here, we create the variable using the createVariable method. This method takes 3 arguments: a variable name (string type), data types, a tuple containing the dimension. We have also added some attributes such as for the variable lat, we added the attribute of units and long_name. Also, notice the units of the time variable.
We also have defined the 3-dimensional variable “temp” which is dependent on the other variables time, lat and lon.
In addition to the custom attributes, the netCDF provides some pre-defined attributes as well.
print("-- Some pre-defined attributes for variable temp:")
print("temp.dimensions:", temp.dimensions)
print("temp.shape:", temp.shape)
print("temp.dtype:", temp.dtype)
print("temp.ndim:", temp.ndim)
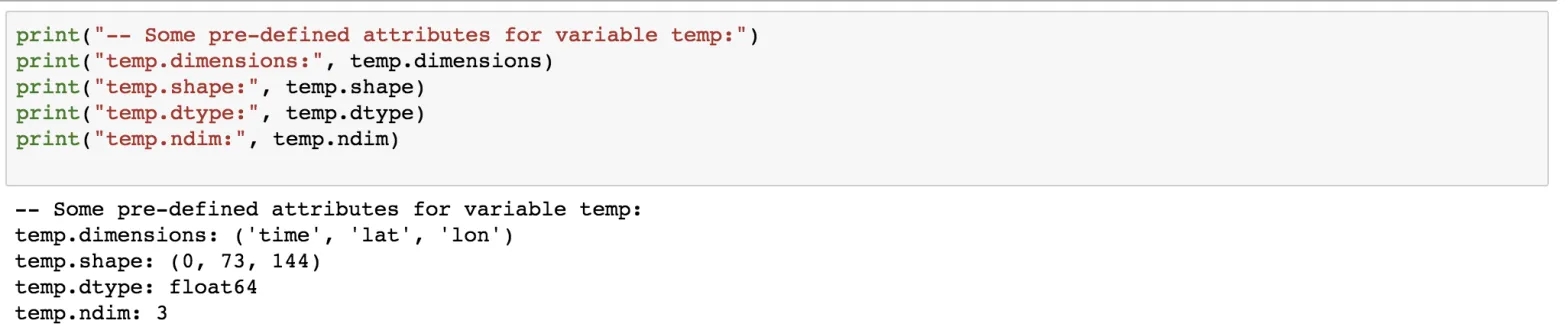
Since no data has been added, the length of the time dimension is 0.
Writing Data
nlats = len(lat_dim); nlons = len(lon_dim); ntimes = 3
lat[:] = -90. + (180./nlats)*np.arange(nlats) # south pole to north pole
lon[:] = (180./nlats)*np.arange(nlons) # Greenwich meridian eastward
data_arr = np.random.uniform(low=280,high=330,size=(ntimes,nlats,nlons))
temp[:,:,:] = data_arr # Appends data along unlimited dimension
print("-- Wrote data, temp.shape is now ", temp.shape)
print("-- Min/Max values:", temp[:,:,:].min(), temp[:,:,:].max())
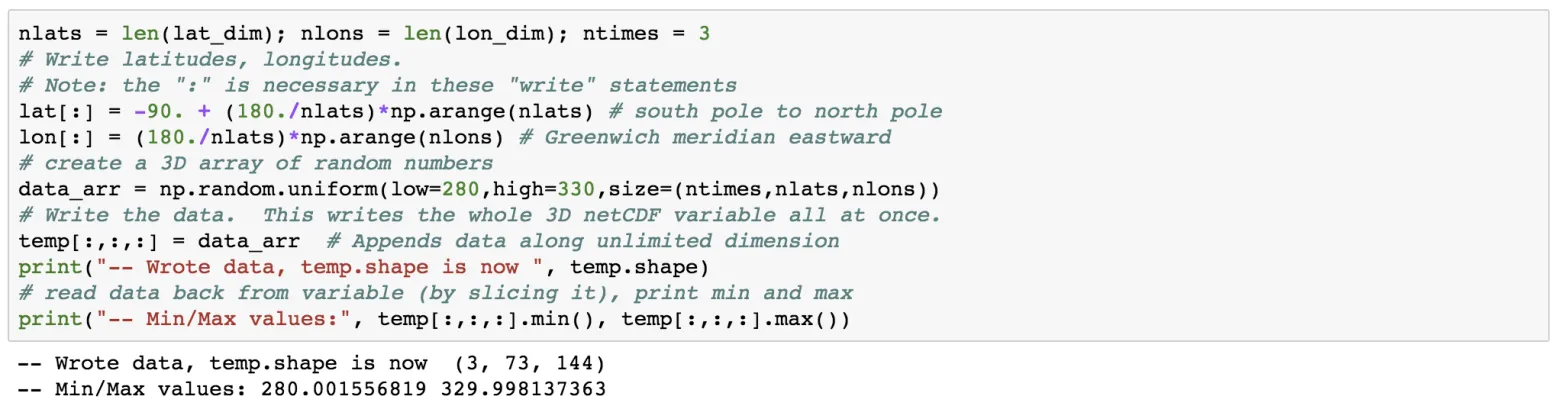
The length of the lat and lon variable will be equal to its dimension. Since the length of the time variable is unlimited and is subject to grow, we can give it any size. We can treat netCDF array as a numpy array and add data to it. The above statement writes all the data at once, but we can do it iteratively as well.
Now, let’s add another time slice.
data_slice = np.random.uniform(low=280,high=330,size=(nlats,nlons))
temp[3,:,:] = data_slice
print("-- Wrote more data, temp.shape is now ", temp.shape)

Note, that we haven’t added any data to the time variable yet.
print(time)
times_arr = time[:]
print(type(times_arr),times_arr)
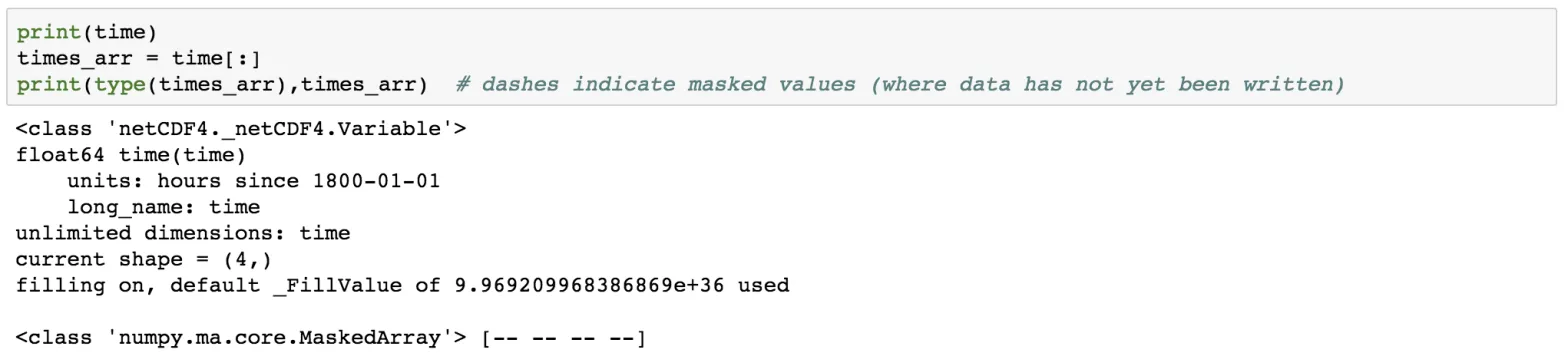
The dashes indicate that there is no data available. Also, notice the 4 dashes corresponding to the four levels in of the time stacks.
I have done several posts of plotting high-resolution maps with geospatial data in Python and Generic Mapping Tools. For the list of all the mapping tools I have covered, visit collections.
Now, let us write some data to the time variable using the datetime module of Python and the date2num function of netCDF4.
import datetime as dt
from netCDF4 import date2num,num2date
dates = [dt.datetime(2014,10,1,0),dt.datetime(2014,10,2,0),dt.datetime(2014,10,3,0),dt.datetime(2014,10,4,0)]
print(dates)

times = date2num(dates, time.units)
print(times, time.units) # numeric values

Now, it’s important to close the netCDF file which has been opened previously. This flushes buffers to make sure all the data gets written. It also releases the memory resources used by the netCDF file.
# first print the Dataset object to see what we've got
print(ncfile)
# close the Dataset.
ncfile.close(); print('Dataset is closed!')

Disclaimer of liability
The information provided by the Earth Inversion is made available for educational purposes only.
Whilst we endeavor to keep the information up-to-date and correct. Earth Inversion makes no representations or warranties of any kind, express or implied about the completeness, accuracy, reliability, suitability or availability with respect to the website or the information, products, services or related graphics content on the website for any purpose.
UNDER NO CIRCUMSTANCE SHALL WE HAVE ANY LIABILITY TO YOU FOR ANY LOSS OR DAMAGE OF ANY KIND INCURRED AS A RESULT OF THE USE OF THE SITE OR RELIANCE ON ANY INFORMATION PROVIDED ON THE SITE. ANY RELIANCE YOU PLACED ON SUCH MATERIAL IS THEREFORE STRICTLY AT YOUR OWN RISK.
Leave a comment