Build a Flask Web Application: Sea Level Rise Monitoring (codes included)
Video
Introduction
In this post, I will give a quick introduction of how to build a web app using Flask. Flask is a web framework written in Python. It is not as mature as Django (the other popular Python web framework) as it lacks database abstraction layer, form validation, or direct integration with the pre-existing third party libraries. But, it is very easy to learn for beginners and can be made to work with third party libraries with some easy tweaks. As, this post is not about the differences between Flask and Django, so I will skip this part.
For more details on how to use Flask, visit the Flask Tutorial.
Or for the detailed tutorial, visit miguelgrinberg.com
Key idea — Flask maps URLs to Python functions. When a browser requests a URL, Flask looks for a route — a function decorated with @app.route('/...') — runs that view function, and whatever the function returns becomes the response the browser displays. That return value can be a plain string ("Hello, World!"), or, for a real page, render_template(...) filling an HTML/Jinja2 template with your data. Build the app by adding one route per page; deploying it just means running the same code on a server instead of your laptop.
Build your first flask application
python -m venv venv
source venv/bin/activate
pip install flask
Create a package
In Python, a directory that contains __init__.py is considered a package and can be imported to build an app (in this case).
app/__init__.py
from flask import Flask
app = Flask(__name__) #the name of the module and necessary to configure Flask
from app import routes
Then you need to create the files:
app/routes.py
from app import app

@app.route('/')
@app.route('/index')
def index():
    return "Hello, World!"
run.py
from app import app

if __name__=="__main__":
    app.run(debug=True)
At this level, your project directory should look like this:
hello-world-app
├── app
│   ├── __init__.py
│   ├── __pycache__
│   └── routes.py
├── run.py
└── venv
Execute the app
So, your first app is ready. You can run the app by simply executing
python run.py
This will return:
 * Serving Flask app "app" (lazy loading)
 * Environment: production
   WARNING: This is a development server. Do not use it in a production deployment.
   Use a production WSGI server instead.
 * Debug mode: on
 * Running on http://127.0.0.1:5000/ (Press CTRL+C to quit)
 * Restarting with stat
 * Debugger is active!
 * Debugger PIN: 124-492-379
You can copy and paste the http://127.0.0.1:5000/ into your preferred browser to view the return of this application. In this case, it will simply print Hello, World. Next, we structure this application with some html templates with the help of Jinja2. Jinga is a template engine for the Python and handles templates in a sandbox.
Preview of SLRM application
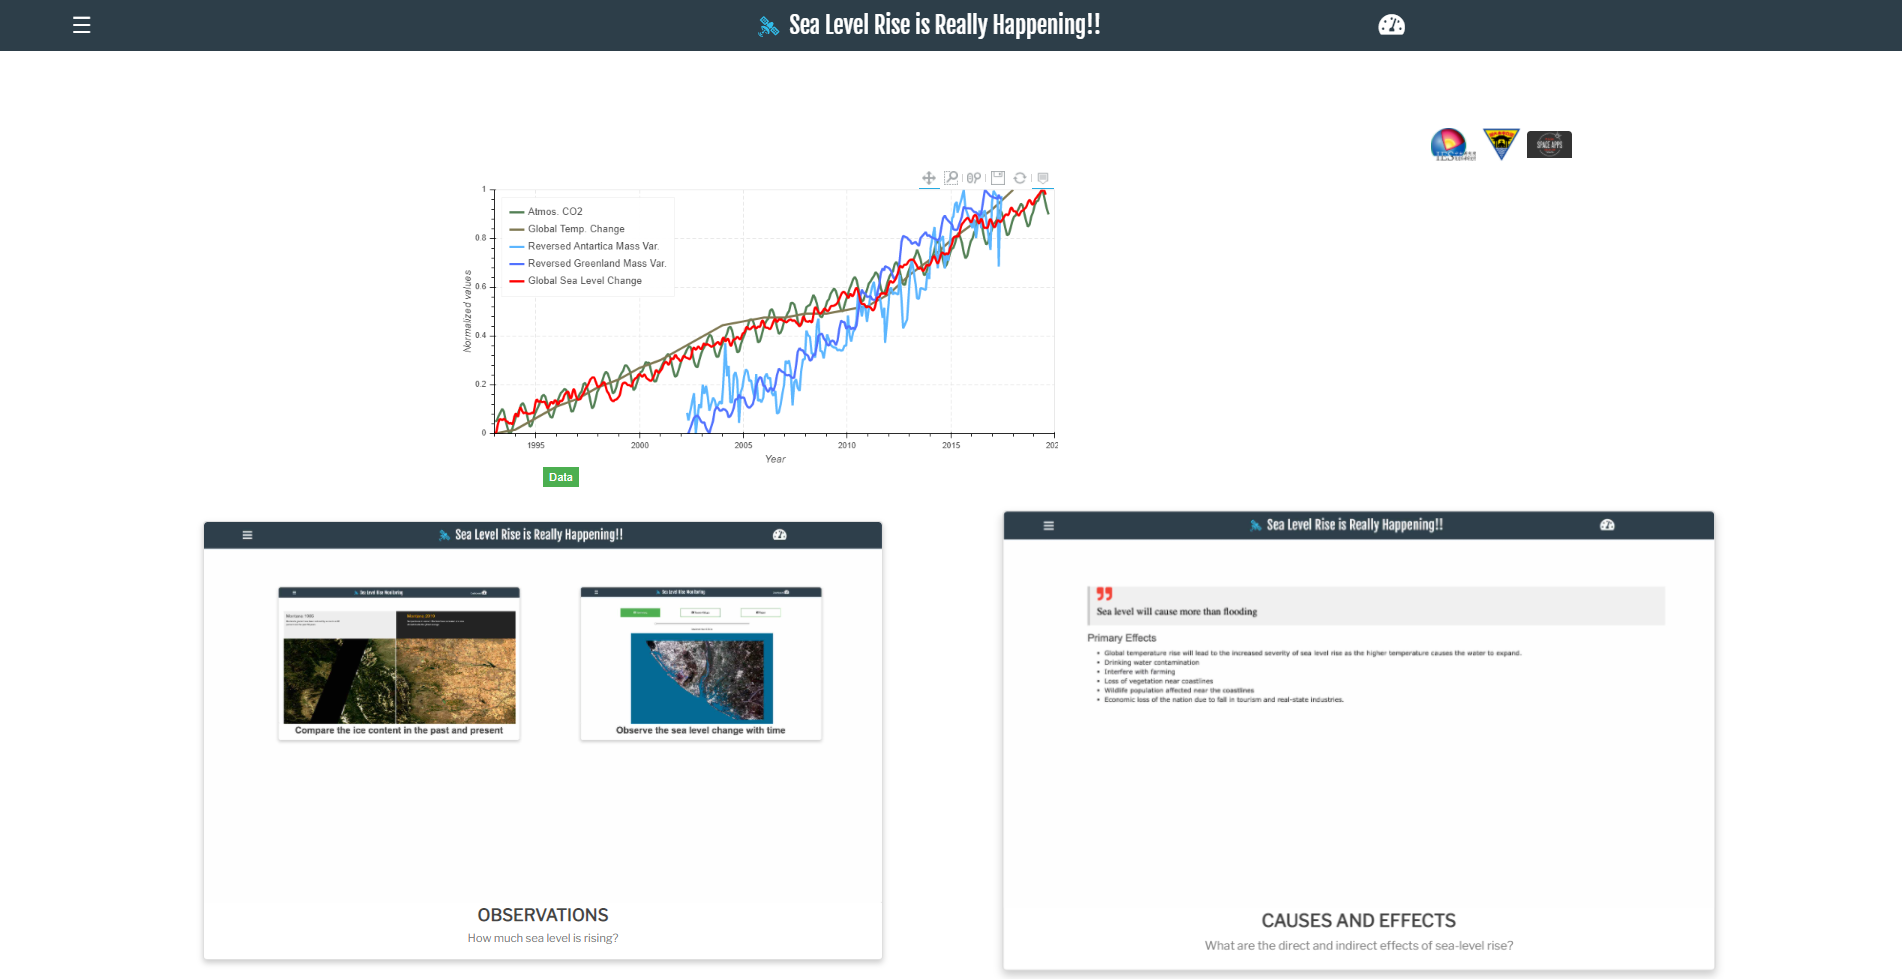
The live demo link is no longer active. The old slrm.herokuapp.com address is down — Heroku shut off its free *.herokuapp.com apps when it ended free plans (see the deploy note below). The screenshot above shows what the app looked like, and the source code is still available on GitHub.
Download SLRM Codes
Source Code:
![]()
git clone https://github.com/earthinversion/Sea-Level-Rise-Monitoring-Web-Application-Source-Code.git
Please note that SLRM application uses several other libraries inclduing the boto3 API (for storing data into AWS-S3). This post do not deal with the description of the installation and use of the boto3 API. But a look into the SLRM project directory may help you in building advanced apps.
How to deploy the app
Heroku ended its free tier in November 2022. The heroku create / git push heroku workflow below still works, but Heroku no longer offers free dynos — you now need a paid (Eco/Basic) plan, which is why the original demo link is dead. The concepts here transfer directly to platforms that still have a free or low-cost Flask tier: Render, Fly.io, Railway, and PythonAnywhere. Each wants the same three things this app already has: a requirements.txt, a start command (gunicorn run:app, as in the Procfile), and your git repo. Note too that Heroku now defaults to the main branch, so a fresh setup uses git push heroku main.
Let us deploy the app on Heroku using git.
Heroku is a cloud platform supporting several programming languages. It allows a developer to build, run, and scale different applications. Heroku hosts its services on the Amazon’s EC2 cloud computing platform. The Heroku applications have a unique domain name “appname.herokuapp.com” which routes the run requests to the correct application containers or “dynos”.
For deploying an app on the Heroku server, we first need to install Heroku on the local computer. On Mac, just install using the Heroku and Git installer and it should do the job.
Change directory to the Sea-Level-Rise-Monitoring-Web-Application-Source-Code
cd Sea-Level-Rise-Monitoring-Web-Application-Source-Code/
Initialize the git and create virtual environment locally
git init
python -m venv venv #create a virtual environent
source venv/bin/activate #activate the virtual environment
virtualenv creates a fresh Python instance. You need to install all the Python dependencies. The dependencies are listed in the requirements.txt file.
arrow==0.15.2
asn1crypto==1.1.0
beautifulsoup4==4.8.1
bibtexparser==1.1.0
boto3==1.9.248
botocore==1.12.248
certifi==2019.9.11
cffi==1.12.3
chardet==3.0.4
Click==7.0
cryptography==2.7
docutils==0.15.2
Flask==1.1.1
future==0.18.0
gunicorn==19.9.0
idna==2.8
itsdangerous==1.1.0
Jinja2==2.10.3
jmespath==0.9.4
MarkupSafe==1.1.1
numpy==1.17.2
pandas==0.25.1
pycparser==2.19
pyOpenSSL==19.0.0
pyparsing==2.4.2
python-dateutil==2.8.0
pytz==2019.3
requests==2.22.0
s3transfer==0.2.1
scholarly==0.2.5
six==1.12.0
soupsieve==1.9.4
urllib3==1.25.6
Werkzeug==0.16.0
These pins are from 2019 — expect to refresh them. This requirements.txt captures the exact versions the app shipped with (Flask==1.1.1, pandas==0.25.1, numpy==1.17.2, …). They still install on older Python, but on a current interpreter you will want to bump them: Flask is now 3.x and pandas 2.x. A couple of API notes if you upgrade — Flask removed the re-exported flask.escape / flask.Markup in 3.0 (import them from markupsafe instead), and app.run(debug=True) still works though flask run is the recommended dev-server command. Regenerate the file after upgrading with pip freeze > requirements.txt.
All these dependencies can be quickly installed using the command:
pip install -r requirements.txt
Prepare the folder
For the app to be deployed, you need the following file:
run.py: this file reads the `slrm` app that exists in the directory `app`.gitignore: to ignore all the files you don't want to deploy on the server-
Procfile:web: gunicorn run:app -
requirements.txt:pip freeze > requirements.txt
Deploy on Heroku
heroku create slrm-app # change slrm-app to a unique name
git add . # add all files to git
git commit -m 'Initial app boilerplate'
git push heroku master # deploy code to heroku
heroku ps:scale web=1  # run the app with a 1 heroku "dyno"
Then, you should be able to view the app on https://slrm-app.herokuapp.com.
Edit the app
You can edit and redeploy the app, following:
git status # view the changes
git add .  # add all the changes
git commit -m 'a description of the changes'
git push heroku master
Quick check: In a Flask app, what does the @app.route('/index') decorator do?
- It installs the Flask package
- It tells Flask that requests to the
/indexURL should run the function directly below it - It starts the production web server
- It creates the HTML template for the page
Recap
- Flask maps URLs to Python functions. A
@app.route('/...')decorator binds a URL to a view function, and that function’s return value is the response the browser gets. - The smallest app is three files —
app/__init__.py(create theFlaskapp),app/routes.py(the routes), andrun.py(app.run(debug=True)) — run withpython run.pyand viewed athttp://127.0.0.1:5000/. - For real pages, return
render_template(...)to fill an HTML/Jinja2 template with your data instead of a plain string. - Deploying means running the same code on a server. It needs a
requirements.txt, a start command (gunicorn run:appin theProcfile), and a git push — the pattern is the same whether the host is Heroku, Render, Fly.io, or Railway. - The pinned versions here are from 2019; on a fresh setup, upgrade to Flask 3.x / pandas 2.x and regenerate
requirements.txt.
Where to go next
- A FastAPI calculator with a full DevOps pipeline — the modern async cousin of Flask, with tests and CI/CD.
- Build a local voice-to-text journal app with FastAPI and Whisper — another end-to-end Python web app.
- A modern system monitor app in Python — the desktop counterpart to a web dashboard.
Disclaimer of liability
The information provided by the Earth Inversion is made available for educational purposes only.
Whilst we endeavor to keep the information up-to-date and correct. Earth Inversion makes no representations or warranties of any kind, express or implied about the completeness, accuracy, reliability, suitability or availability with respect to the website or the information, products, services or related graphics content on the website for any purpose.
UNDER NO CIRCUMSTANCE SHALL WE HAVE ANY LIABILITY TO YOU FOR ANY LOSS OR DAMAGE OF ANY KIND INCURRED AS A RESULT OF THE USE OF THE SITE OR RELIANCE ON ANY INFORMATION PROVIDED ON THE SITE. ANY RELIANCE YOU PLACED ON SUCH MATERIAL IS THEREFORE STRICTLY AT YOUR OWN RISK.
Leave a comment